


Tactical Supremacy: A Comprehensive Technical Guide to Arena Breakout: Infinite
Arena Breakout: Infinite is not merely a shooter; it is a high-stakes simulation of physiological stress, ballistic physics, and economic risk management. Unlike arcade shooters where death is a temporary setback, a single miscalculation in the Kamona exclusion zone results in the total loss of invested capital—your gear. To achieve tactical supremacy, a player must move beyond basic aiming skills and master the "Infinite Cycle": preparation, environmental manipulation, and surgical extraction. This guide provides a deep technical dive into the systems that govern high-level play, transforming you from a disposable mercenary into an apex predator of the extraction genre.
1. Pre-Raid Logistics: The Mathematics of Kit Optimization
Before you even step foot into Farm or Valley, the raid is won or lost in your stash. In Arena Breakout: Infinite, the most critical concept is "Effective Value." Every item you bring must serve a specific purpose relative to your mission objective. If you are going in for "Zero-to-Hero" runs, your focus is on high-storage rigs and low-cost, high-flesh-damage SMGs. However, for high-tier loot runs, you must calculate your "Armor-to-Weight Ratio." Carrying Tier 6 armor into a map where you intend to loot heavy technical parts can result in stamina penalties that leave you immobile in the open.
The technical secret to kit optimization lies in the "Muzzle Velocity and Penetration" intersection. You should always prioritize high-tier ammunition over a high-tier weapon. A stock AK-74N firing 5.45x39mm PP or BP rounds is significantly more lethal than a fully modded M4A1 firing low-tier FMJ. Your magazines should be "Stagger-Loaded": the top 5-10 rounds should be your highest penetration tier to break enemy armor, while the bottom of the magazine can be mid-tier rounds to finish off the target, saving you thousands of Koen per raid.
2. Physiological Management: The Bio-Metric Survival Loop
The health system in Arena Breakout: Infinite is segmented and hierarchical. Understanding the "Red Zone" of your character’s vitals is paramount. If your legs are "Blacked Out" (destroyed), your movement speed is halved, and every jump deals damage to your remaining parts. High-level players always carry "Surgical Kits" to restore maximum HP to destroyed limbs. However, the advanced tip is the use of "Pre-Medication." If you anticipate a firefight near an extraction point, consuming painkillers before the first shot is fired ensures that even if your legs are destroyed, you can still sprint to cover without the agonizing delay of the "limp" animation.
Hydration and Nutrition Calculus
- Energy Consumption: Sprinting and carrying over 80% of your weight capacity drains energy exponentially.
- Dehydration Penalties: Once your hydration hits zero, your vision blurs, and you begin taking periodic damage to your thorax.
- Optimized Consumables: Always carry "Energy Drinks" for a dual-benefit of hydration and a temporary stamina regen boost, rather than just plain water.
3. Ballistic Science: Understanding Armor Tiers and Caliber Overmatch
Every bullet in the game has a penetration value and a base damage value. The "Penetration Level" corresponds directly to the "Armor Tier." A Tier 3 bullet has a high probability of penetrating Tier 3 armor on the first hit but will be almost entirely stopped by Tier 5 plates. However, the game simulates "Armor Durability Degradation." Even if your bullet cannot penetrate, it reduces the durability of the armor. Technical players use "Leg Meta" when facing Tier 6 "Chads"—firing high-flesh-damage rounds (like 9x19mm Dum-Dum) at the unprotected legs to bypass armor entirely and secure a kill in less than a second.
Armor Material Performance
- Steel/Ceramic: High protection but high weight and difficult to repair without losing maximum durability.
- Polyethylene/Titanium: Lightweight and durable, ideal for long-distance flanking maneuvers where stamina is key.
- Repair Efficiency: Always check the "Estimated Durability" after a repair; if a Tier 5 vest drops below 40% of its original max health, it effectively functions as a Tier 3 vest.
4. Environmental Mastery: Sound Cues and Footstep Visualization
In Arena Breakout: Infinite, sound is more informative than sight. The game uses a complex binaural audio system that allows you to pinpoint an enemy's exact floor and room. However, you must also manage your "Noise Footprint." Different surfaces produce different decibel levels; metal stairs and glass shards are "High-Alert" surfaces. Advanced movement involves "Slow-Walking" (default Caps Lock) to completely remove your footstep indicator from the enemy's visual sound-bar, allowing for a stealthy execution.
Sound Suppression Tactics
- Headset Hierarchy: Never enter a raid without a tactical headset. The "GS2" or "ComTac" headsets amplify quiet footsteps while suppressing the deafening boom of grenades.
- Intermittent Movement: Move in short bursts. Sprint for three seconds, then stop and listen. This breaks up your sound pattern, making it harder for an enemy to predict your arrival.
- Rain and Wind: Use environmental noise (thunder or heavy rain) to mask the sound of you breaching a door or sprinting across a courtyard.
5. Map Control: Dominating Choke Points and High-Loot Zones
Success is determined by your knowledge of "Player Flow." On the Farm map, for instance, players from the East and West spawns inevitably converge on the Motel. Mastering this map requires knowing the "Timing Windows." If you spawn at the Villa, you have exactly 90 seconds to loot the safes before the team from the Wheat Field arrives. Technical mastery involves "Spawn Pushing"—knowing where the adjacent team spawned and setting up an ambush within the first 30 seconds of the raid to clear your flank.
Tactical Positioning
- Right-Hand Peek: The character is right-handed. Peeking from the right side of cover exposes significantly less of your head and thorax than peeking from the left.
- The "Vantage" Rule: Always seek high ground. The "Valley" map is dominated by snipers who understand that shooting downward reduces the effective thickness of the enemy's helmet due to the angle of incidence.
- Hard vs. Soft Cover: Understand that wooden doors and thin sheet metal provide "Concealment" but not "Cover." High-penetration rounds (Tier 4+) will pass through these objects with minimal damage reduction.
6. The Economy of Loot: Calculating "Value Per Slot"
Your backpack is a limited grid, and maximizing your profit requires a "Koen-per-Slot" (KPS) mindset. A large car battery might be worth 15,000 Koen, but it takes up 6 slots (2,500 KPS). Conversely, a gold CPU fan might be worth 10,000 Koen but only takes up 2 slots (5,000 KPS). To become wealthy in Infinite, you must learn to discard low-KPS items for high-density loot like keys, specialized computer parts, and high-tier ammunition stripped from downed enemies.
Stash Management Hacks
- Rig Compression: Use tactical rigs inside your stash to create "Nested Storage." A rig that takes up 12 slots but provides 16 slots of internal storage is free space.
- Magazine Stripping: Never extract with an enemy's weapon unless it is highly modded. Instead, strip the high-tier suppressor, the expensive optic, and the magazines, then leave the heavy base weapon behind.
- Market Timing: Sell your "Purple" tier items during peak weekend hours when demand is high and supply fluctuates, maximizing your profit margins.
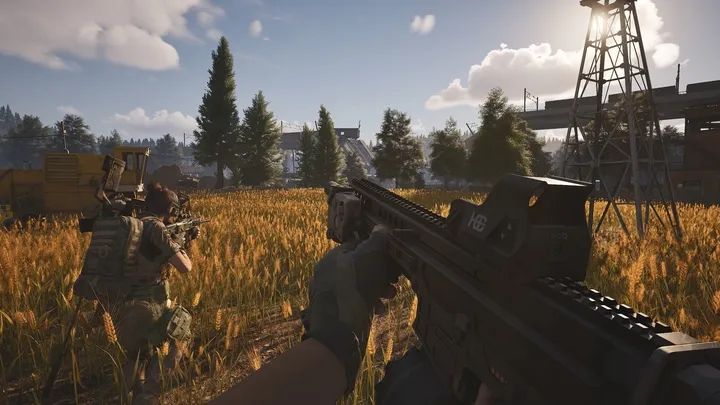
7. Firefight Geometry: Point-Fire vs. Aiming Down Sights
In close-quarters combat (CQC), the time it takes to "Aim Down Sights" (ADS) is often longer than the time it takes to die. Arena Breakout: Infinite features highly accurate "Point-Fire" (hip-fire). By equipping lasers—specifically the Blue or Green tactical lasers—you can maintain a tight spread at up to 15 meters without ever looking through your scope. This allows for better peripheral vision and faster movement speed while firing, which is essential for clearing rooms in the Motel or the Villa.
Recoil Control Mechanics
- The "Pull-Down" Curve: Most weapons have high initial vertical recoil for the first 3-5 shots, followed by a stabilized horizontal sway.
- Ergonomics vs. Recoil: High ergonomics allows for faster ADS and longer breath-holding, while high recoil control is for sustained fire. For snipers, Ergo is king; for SMGs, Recoil is the priority.
- Crouch Buffering: Crouching or going prone reduces vertical recoil by approximately 30-50%. Always "Drop-Shot" or crouch when engaging at medium ranges.
8. Squad Synergy: The "Diamond" and "Leap-Frog" Formations
Playing in a squad requires "Tactical Discipline." The most common cause of squad wipes is "Bunching"—standing too close together and allowing a single grenade to kill everyone. Advanced squads use the "Leap-Frog" (Overwatch) technique: one player stays stationary with a magnified optic covering the area, while the other three move forward. Once the three find cover, they provide overwatch for the first player to catch up.
Team Communication Protocols
- Directional Callouts: Use the compass at the top of the HUD. "Contact North 15" is infinitely more useful than "He’s over there!"
- Status Reports: Communicate your status clearly. "Reloading," "Healing," or "Stamina Low" tells your teammates when they need to step up and cover your position.
- Loot Distribution: An efficient squad shares the wealth. If one player finds a "Red" tier item, they should be the primary focus of protection for the rest of the raid, as their successful extraction is the team's victory.
9. Extraction Psychology: Navigating the "Final Five" Minutes
The most dangerous part of any raid is the final 200 meters to the extraction point. "Exit Camping" is a legitimate, albeit frustrating, tactic used by low-geared players. To counter this, you must save a "Frag Grenade" or a "Flashbang" specifically for the extraction zone. "Pre-Grenading" common bushes or corners near the extract can flush out campers or force them to relocate, giving you the window needed to initiate the countdown.
Safe Extraction Protocols
- Smoke Screening: Use smoke grenades to cover the extraction timer, but remember that thermal optics can see through standard smoke.
- Varying Your Path: Never take the most direct route to the extract. Circle around the perimeter and enter from an unexpected angle.
- The "Fake" Extract: If you suspect a camper, run into the extraction zone to trigger the timer for 2 seconds, then immediately sprint back out to a defensive position to bait the camper into showing themselves.
10. Risk Mitigation: The Philosophy of the "Scavenger" Mentality
Not every raid needs to be a bloodbath. In Arena Breakout: Infinite, knowing when to "Disengage" is the sign of a veteran. If you have a backpack full of high-value technical loot and you hear a squad of four approaching, the correct play is often to hide and let them pass. "Greed" is the primary killer. Establishing a "Profit Floor"—a specific amount of loot value at which you immediately head for extraction—will ensure your stash value grows consistently over time.
Conclusion
Mastering Arena Breakout: Infinite is a journey of constant adaptation. It requires the cold calculation of an economist, the steady hand of a marksman, and the patience of a hunter. By optimizing your gear logistics, mastering the intricate soundscapes of Kamona, and understanding the deep ballistic systems that govern every engagement, you move beyond the ranks of the "Timmy" and into the elite circle of successful operators. Remember: the goal isn't just to kill; it is to survive, loot, and extract. Every raid is a lesson, and every death is a tax paid for future knowledge. Strap on your headset, check your chamber, and embrace the infinite cycle of the breakout.